After a long Vermont winter we all get a little blue.
We all need to get outside! We need to leave our coats and hats and boots behind. We need to wear sneakers, ride bikes, see some green, roll in the grass, play ball, ride a pony and dig in the garden. Spring fever is a real thing!
I recently visited the kindergartners at Orwell Village School and talked about writing and art, filling your page and adding detail. They must have soaked it all in–like spring sunshine. Today I received this video, made with the help of their wonderful teacher Josh Martin:
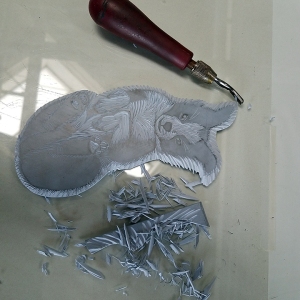
One block, carved and cut apart into 4 pieces. The artist separated the pieces, inked each piece in a different color, reassembled them, and printed them as one piece.
I chose Blick Readycut blocks for our projects because it is easy to carve. I wanted to the students to try making a multiple color print, like the one above, using just one block cut into pieces in order to prevent registration problems.
Even though I planned this to be a two color print, I carved it all as one piece. It is much easier to cut it apart later. Carving the words became very tricky- probably because my design didn’t leave them enough room.
I often trim off any excess block beyond the design if I don’t want to bother carving it all out.
Once the block was completely carved I used an exacto knife to cut it apart into two pieces.
After my students created a design, reversed it and transferred it to their blocks, they began carving away any part of the block that they DIDN’T want to show in their print.
Once the block is carved and cut apart, each piece is inked using a brayer. The paper is laid gently on top of the inked block and the back of the paper is rubbed with a hard smooth object-such as a spoon or baren.
Finally comes the Ah Ha moment when the paper is pulled and the finished print revealed.
In the end my dog print was only a partial success. The carved quote part was a mess so I discarded it and added some hand lettering instead. Hand adorned giclee prints available here.
For our last meeting I brought in large, cotton tea towels that could be printed using the blocks carved during the class. There were no rules but this was one beautiful and orderly result.
If you enjoyed this post, please follow me here: Ashley Wolff Art on Facebook, my webpage , my Etsy shop, or Instagram. You can follow the blog by hitting the “follow blog” button at the top of the sidebar.
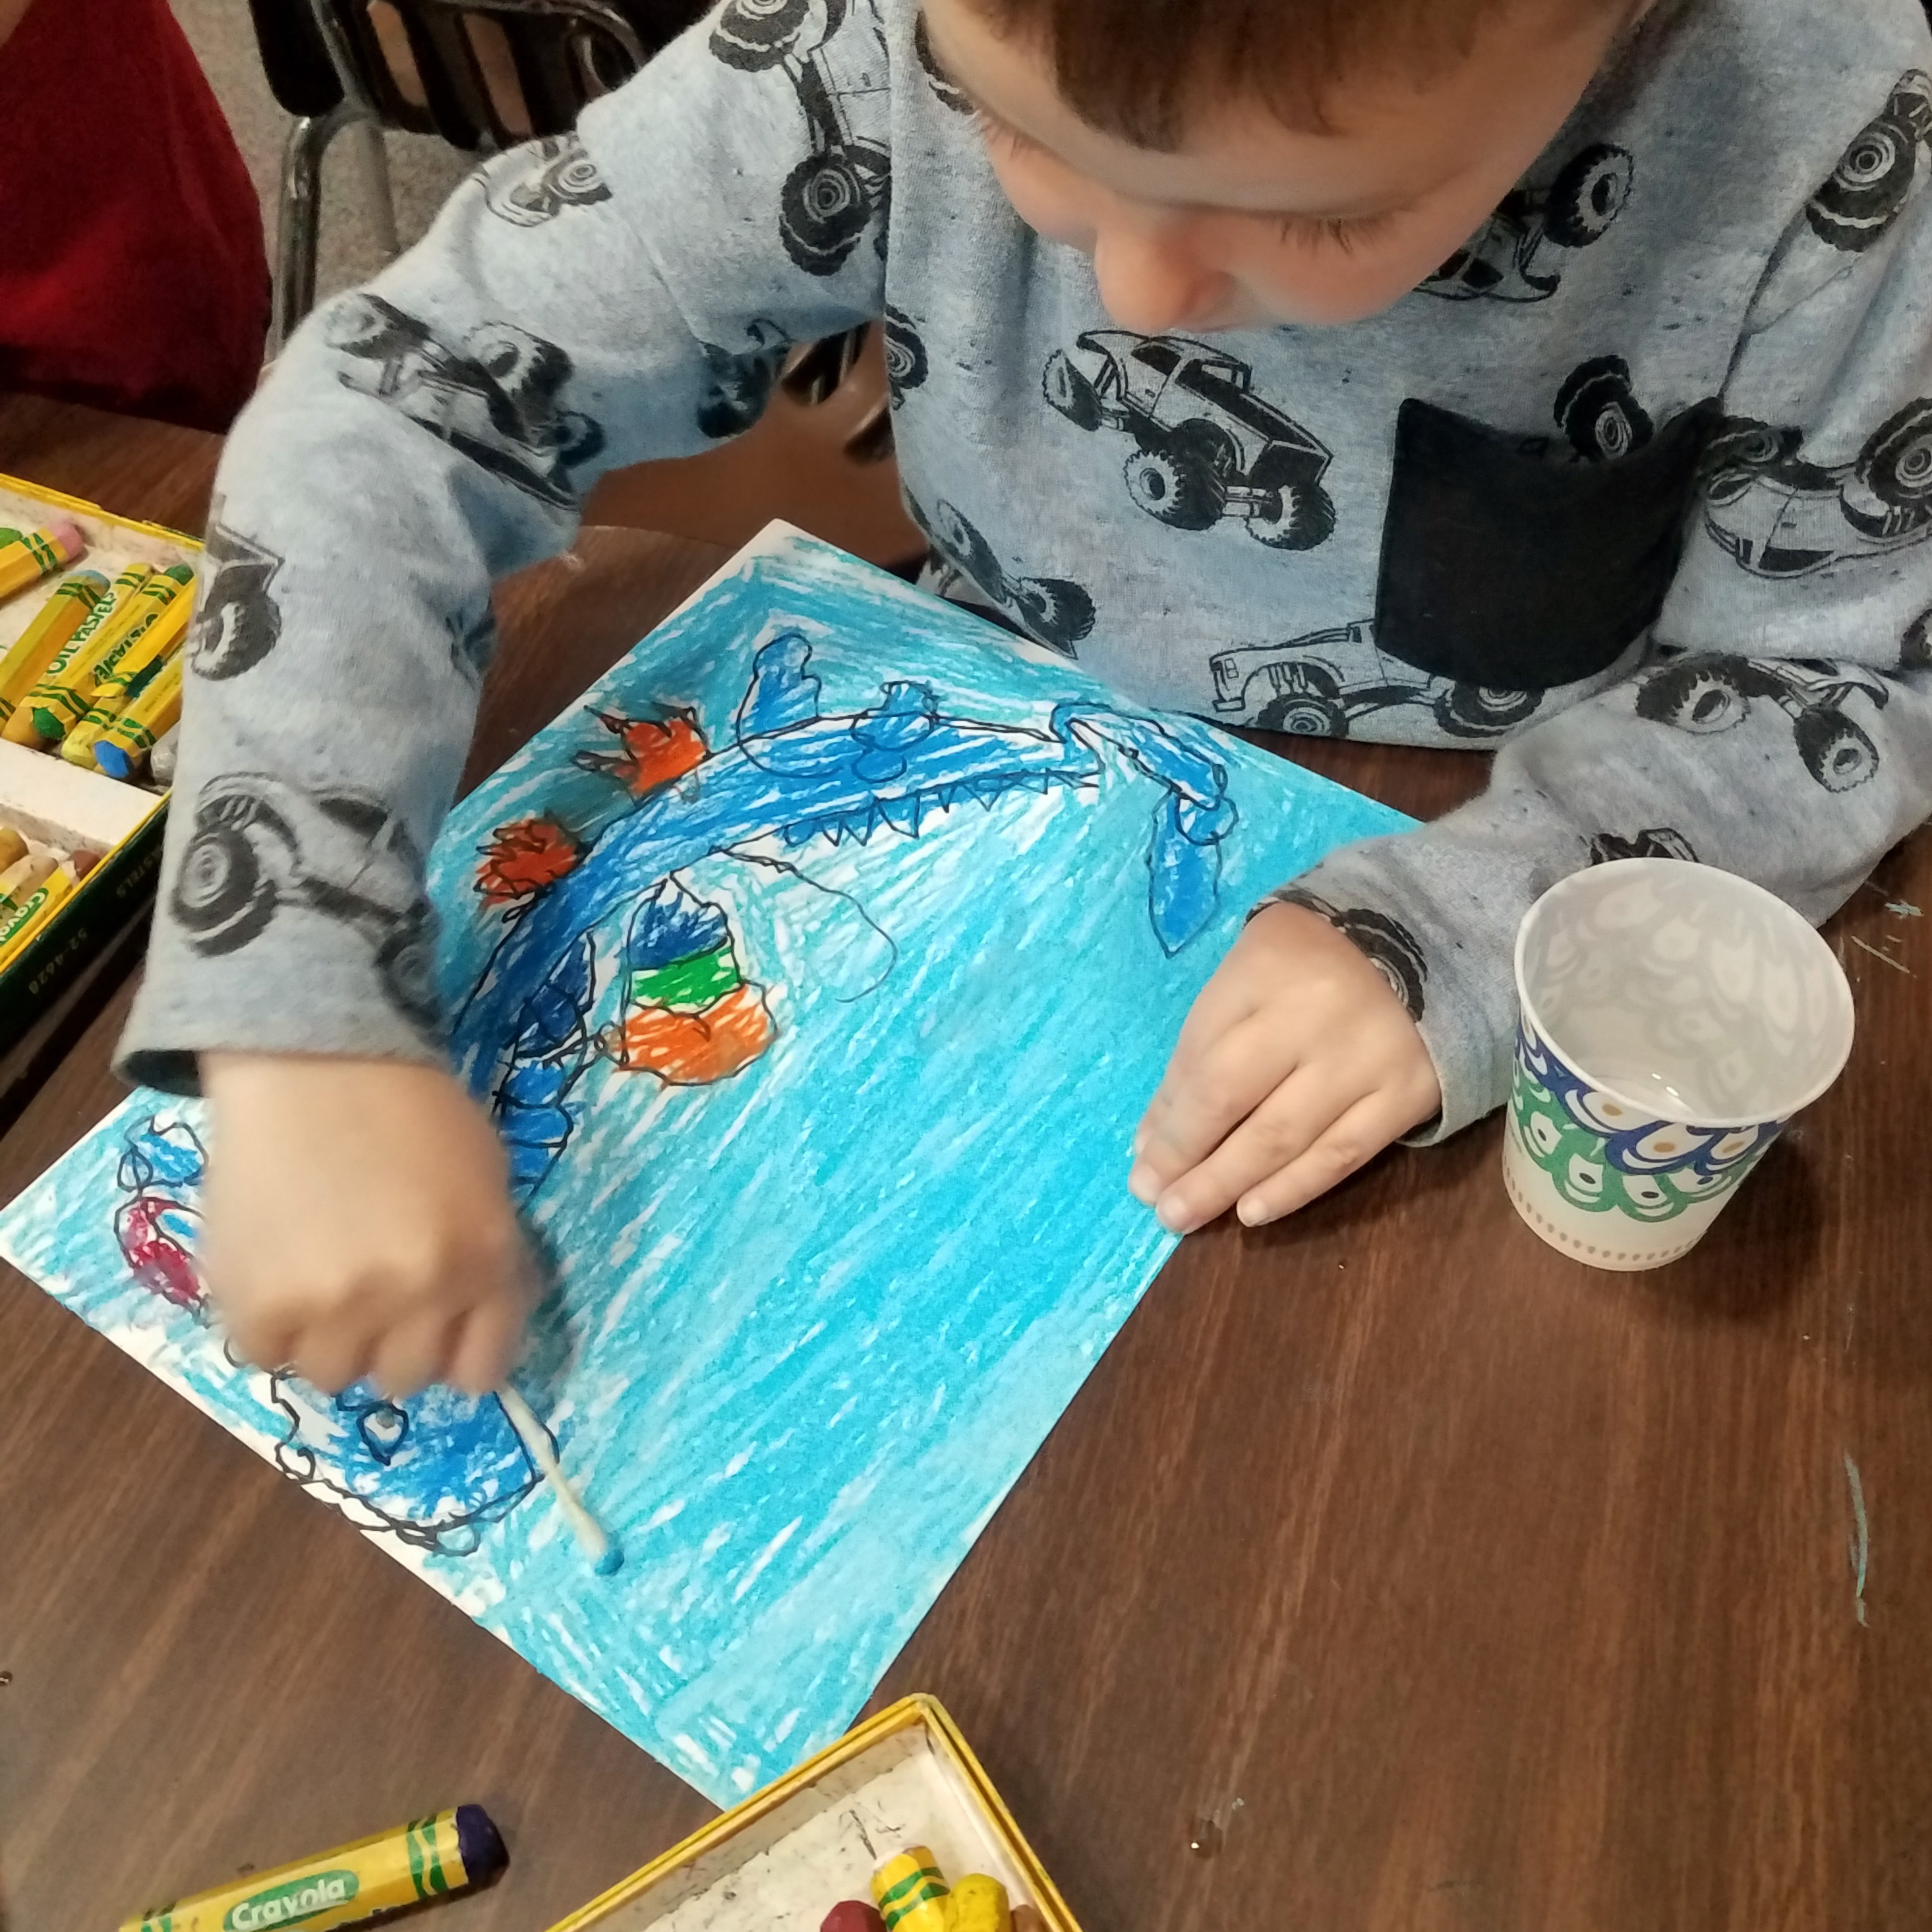
I designed two projects to appeal to my range of ages. My 1st group was 1st graders and we started with a direct draw of a hen and chicks with the help of a document camera.
They all drew with pencil, traced with Sharpie and then started coloring with oil pastels.
Using a document camera I showed how to draw a hen and chicks.
We passed out regular oil pastels and told them to color roughly-leaving areas of white paper would work to their advantage. Some followed this advice…
Once the chickens were colored it was time to use secret sauce (mineral oil)and magic wands (cotton swabs) to make these drawings into oil paintings.
I counseled using a different cotton swab tip for each color, but just like any other painting technique, if you want to, you can make all the colors blend together and end up with a lovely muddy result! With 2nd grade and older I taught them how to draw a flying, fire breathing dragon. We followed the same process of direct draw, Sharpie outline, pastel drawing, and oil painting.
These are great before and after examples showing how the rough coloring results in the smooth final painting.
I also tried teaching the dragon to a T-Kindergarten class and saw some amazing results.
I love how this little guy attacks his coloring and painting with such purpose and enthusiasm.
The duckings were a LITTLE too long to include them all on my corrugated plastic material, which is only 40″ wide, so I had to edit a few out.
Then I cut out the whole flock with a sharp exacto knife, sprayed the material with primer and painted them with acrylics.
Robert McCloskey illustrated Make Way for Ducklings using lithographs. I tried to reproduce this and make it look as close to the original art as possible using only paint brushes.
I’ve been admiring the work of printmakers since I was a small girl and this summer’s project emulates three people whose work has influenced me. I’ve been collecting samples of the work of Andrea Lauren lately. She does small, two color prints using two separate blocks.
Andrea uses two separate blocks and prints one over the other.
You could cut a block into more pieces as well and ink each piece separately. That’s what Woody Jackson did early in his career when he started cutting up zinc etching plates, inking each piece, and putting them back together like puzzles before printing.
I’ve loved Mary Azarian’s work since I was a teenager. Her hand-colored woodcuts of Vermont scenes and her illustrated books influenced my illustration work enormously.
I am teaching at Hollins University again this summer-this time I designed a course called Printmaking for Illustration. To make a sample for my students I used all three of my printmaking idols as inspiration.
My new puppy Rufus has a foxy look similar to Andrea’s print, so I chose one of the dozens of reference photos I have and started designing my own two color linocut.
I decided to use one block and cut it apart into two pieces-Woody Jackson style-right around Rufus. That made getting perfect registration a breeze.
I start by coating the “inside” cut-out of Rufus in black ink with a rubber brayer.
Then I mixed a yellow and a dark green and used them both to ink the grasses on the “outside” block. Sometimes the two colors mixed on the brayer, but I didn’t care-I wanted each print to be one of a kind.
I placed both parts of the inked up block into a custom cut cardboard jig, or frame, to hold them steady, then laid my paper on top.
To make a print I’m merely rubbing the back of the paper firmly with an ordinary wooden spoon. I keep it fairly parallel to the paper so that it presses evenly and doesn’t rip this delicate sheet.
I made a small edition of 20 prints using 2 colors of oil based ink.
When these are dry I’ll hand color each one with watercolors, making them truly one of a kind, just like Mary Azarian does.
Three printmakers-four counting me-all different but with so much in common!
Most famous for Goodnight Moon, her 1942 book The Runaway Bunny, about an adventurous baby bunny and her devoted mama, inspired the first pair of characters to mysteriously appear on campus–right outside the library.
These were all conceived and executed using corrugated, plastic board and acrylic paints by a Fairy Godmother, assisted by her trio of fairy assistants.
Lyndsey and Topher Keppol cutting and priming the Mama Bunny
The fairy godmother painting the Mama Bunny with acrylics
As the summer went past, more and more appeared, until at almost every turn you could find another classic or contemporary children’s book character, casually hanging around, sometimes literally!
If you enjoyed this post, please follow me here: Ashley Wolff Art on Facebook, my webpage , my Etsy shop, or Instagram. You can follow the blog by hitting the “follow blog” button at the top of the sidebar.
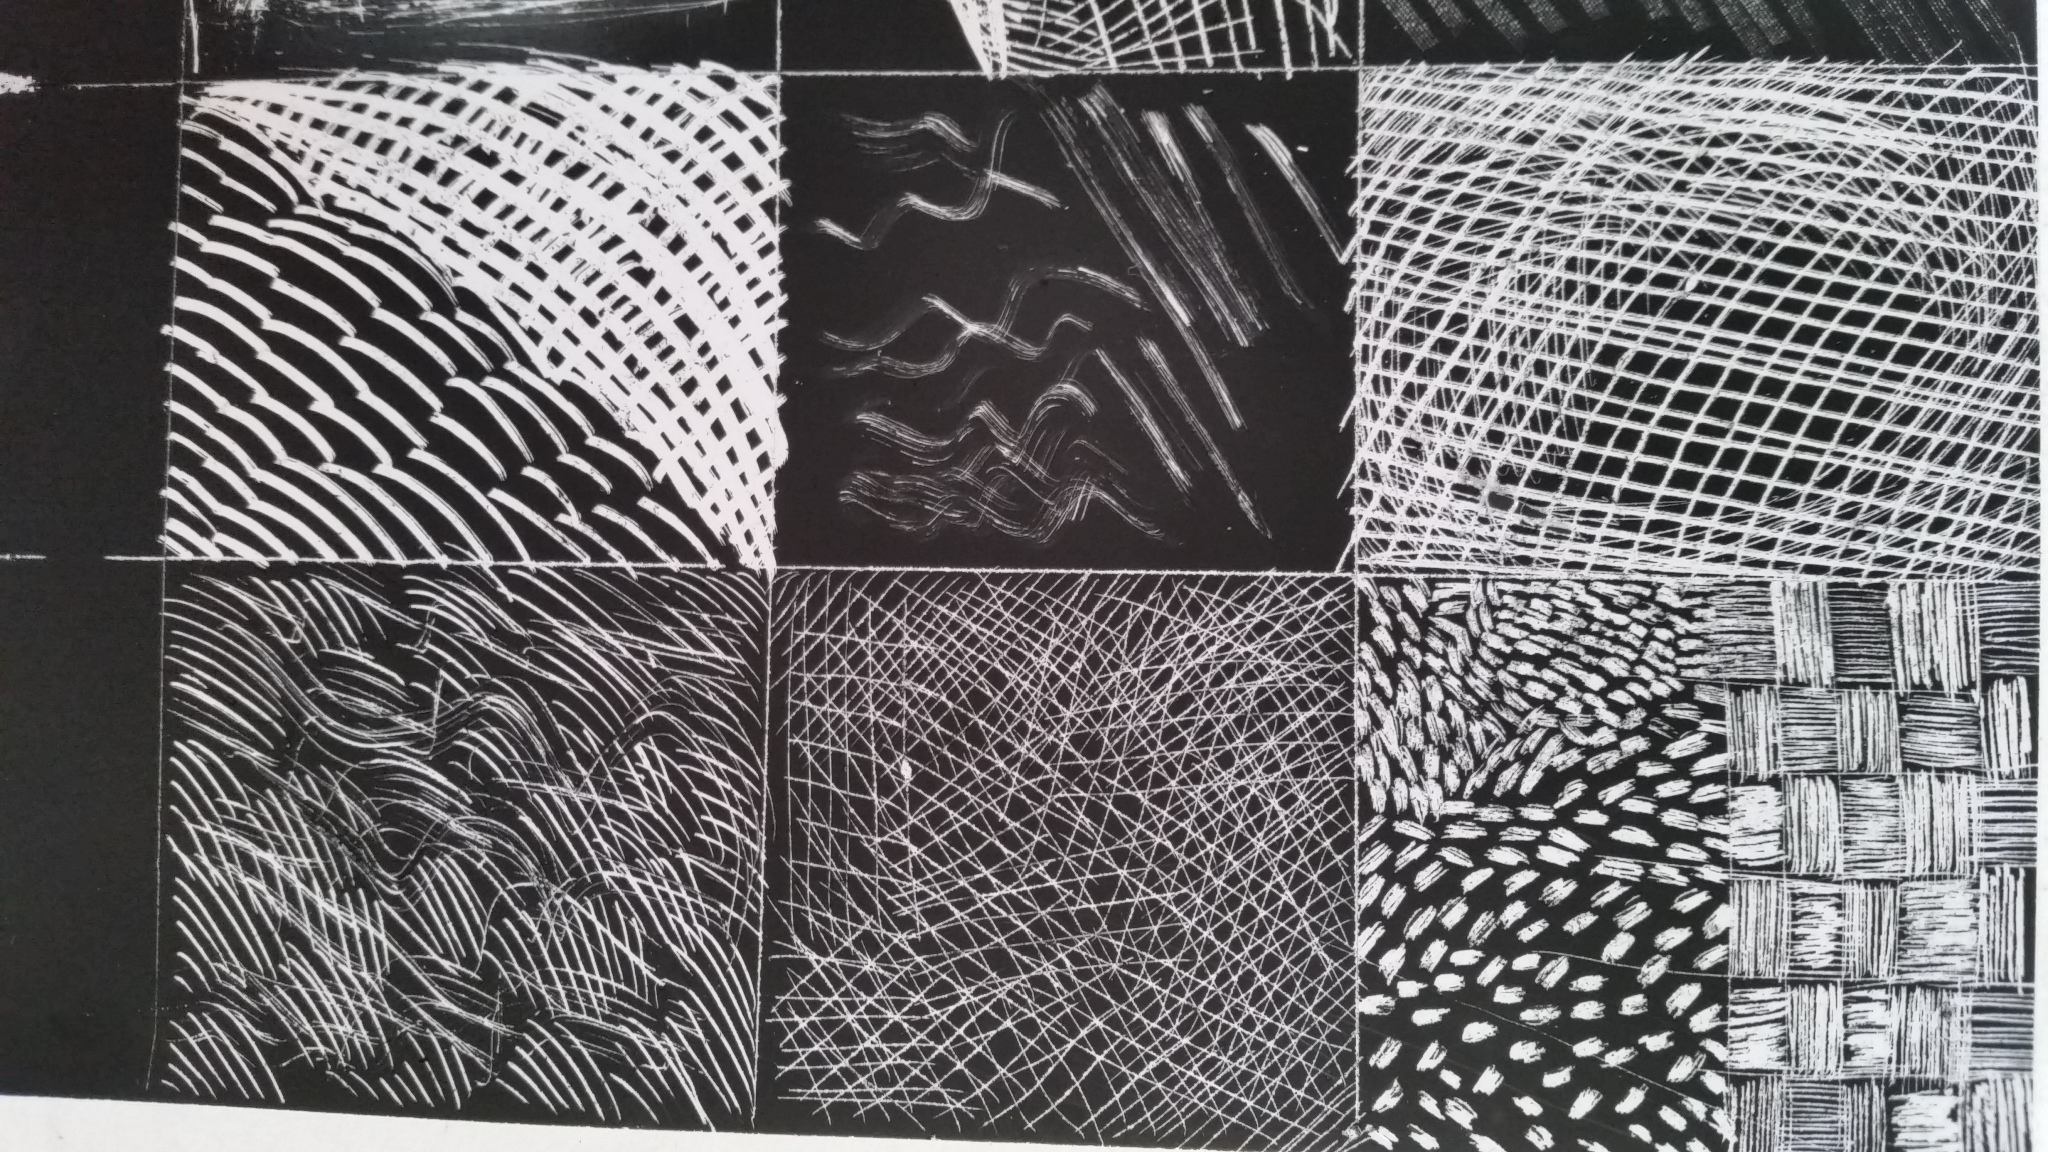
Speaking of taking light out of dark, I’ll continue this summer’s lessons with scratchboard. Using sharp tools we scrape off the top layer of black ink, revealing the white clay layer underneath.
In addition to straight and curved scrapers there are stiff wire brushes, forks with multiple prongs, sandpaper, and steel wool.
The 1st activity is to create a sampler to test how the different tools work.
I always start a piece with a drawing on tracing paper and then apply graphite dust to the back. When this is transferred to the matt black scratchboard it shows up as an easy to see silver line.
Working on a piece of 6″x 6″ Ampersand scratchboard I complete this talkative pig.
If you enjoyed this post, please follow me here: Ashley Wolff Art on Facebook, my webpage , my Etsy shop, or Instagram. You can follow the blog by hitting the “follow blog” button at the top of the sidebar.
A brush charged with water can lift a clean line or destroy a wash
A spray of rubbing alcohol doesn’t make a dent on a dry wash, but drip it onto wet paint and you have fantastic, blobby bullseyes.
A sprinkling of salt makes “stars” on a damp night sky.
Crumpled plastic wrap makes blocks and angles
Your smooth, even wash depends on keeping a wet ‘bead’ moving along under your brush.
Glazing color over color makes every possible combo, yet all you really need to make a whole spectrum are
RedYellow Blue
Then layer red over blue, over yellow to create simple “shadow paintings”
Or use a “negative” painting technique that layers from light to dark to create a deep, mysterious painting.
make a simple design and float watercolors onto wet paper.
Paint around the positive shapes , adding more and more and darkening your washes each time.
keep adding more layers by drawing details into the negative spaces.
Or use a resist medium to create a design, then pour the paint on top .
draw with waterproof resist medium on clean paper.
pour a mix of red, yellow and blue watercolor over the resist drawing.
rub off the resist medium with a fingertip.
this simple owl is just a resist medium drawing with a single pour of watercolors.
If you enjoyed this post, please follow me here: Ashley Wolff Art on Facebook, my webpage , my Etsy shop, or Instagram. You can follow the blog by hitting the “follow blog” button at the top of the sidebar.
Another school year is skipping, ambling, screeching, and wildly cheering to a close. Everyone is restless and eager for release. Erasers are worn to nubs, and so is patience, but, as much as I look forward to summer, I love being in school…
“School” for me might be in Vermont, or California, in Alabama, Texas, Michigan or New Mexico. I’ve been to schools in Utah, Maine, New York and as far away as Tokyo, Japan and New Delhi, India.
I have been to rural schools and urban schools, big and small schools.
I am always excited to arrive
Because now I get to share how I struggled to read, to understand math and to achieve what my 5 year old self really wanted to be–an artist!
When I explain how the words Passion, Practice, Patience, Perseverance and Possession became my 5 Ps, I’m hoping every child can think of their own passion; that activity or special skill that makes work into fun.
More than talking about books, I talk about where stories come from.
My books grow directly out of who I am: a daughter, a sister, a mother, an animal lover, an amateur naturalist, a reader, and, most important– a child at heart.
When we’ve talked about where my stories come from, we make up our own. As I draw animal characters based on their names and ideas, I explain how an illustrator works.
We discuss ideas such as forward momentum, attention to detail, setting, mood, time of day and point of view. They learn to merge text and illustration and how to use the whole page to tell their story.
I arrive early and I leave after all the students have gone. I sign books and pass out bookmarks. I marvel at how the work in school happens every day, even if I just get a one day glimpse. How do teachers muster the energy to come back every day? I need a huge coffee to recover before the ride home, but I always have a good day in your school.
Click here for information on inviting me to your Author Day.
It is one of the entertaining and educational programs the Highlights Foundation supports at their beautiful Pocono Mountains location.
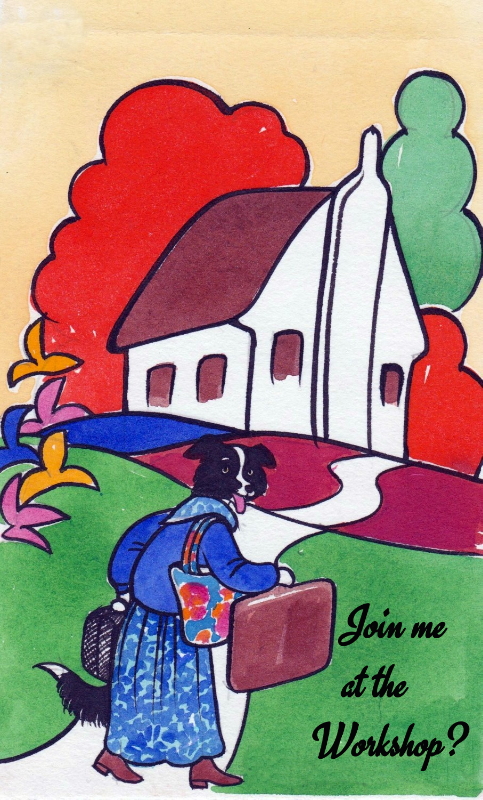
You DON’T need to be an “Artist” to join this workshop. You can register here right now.
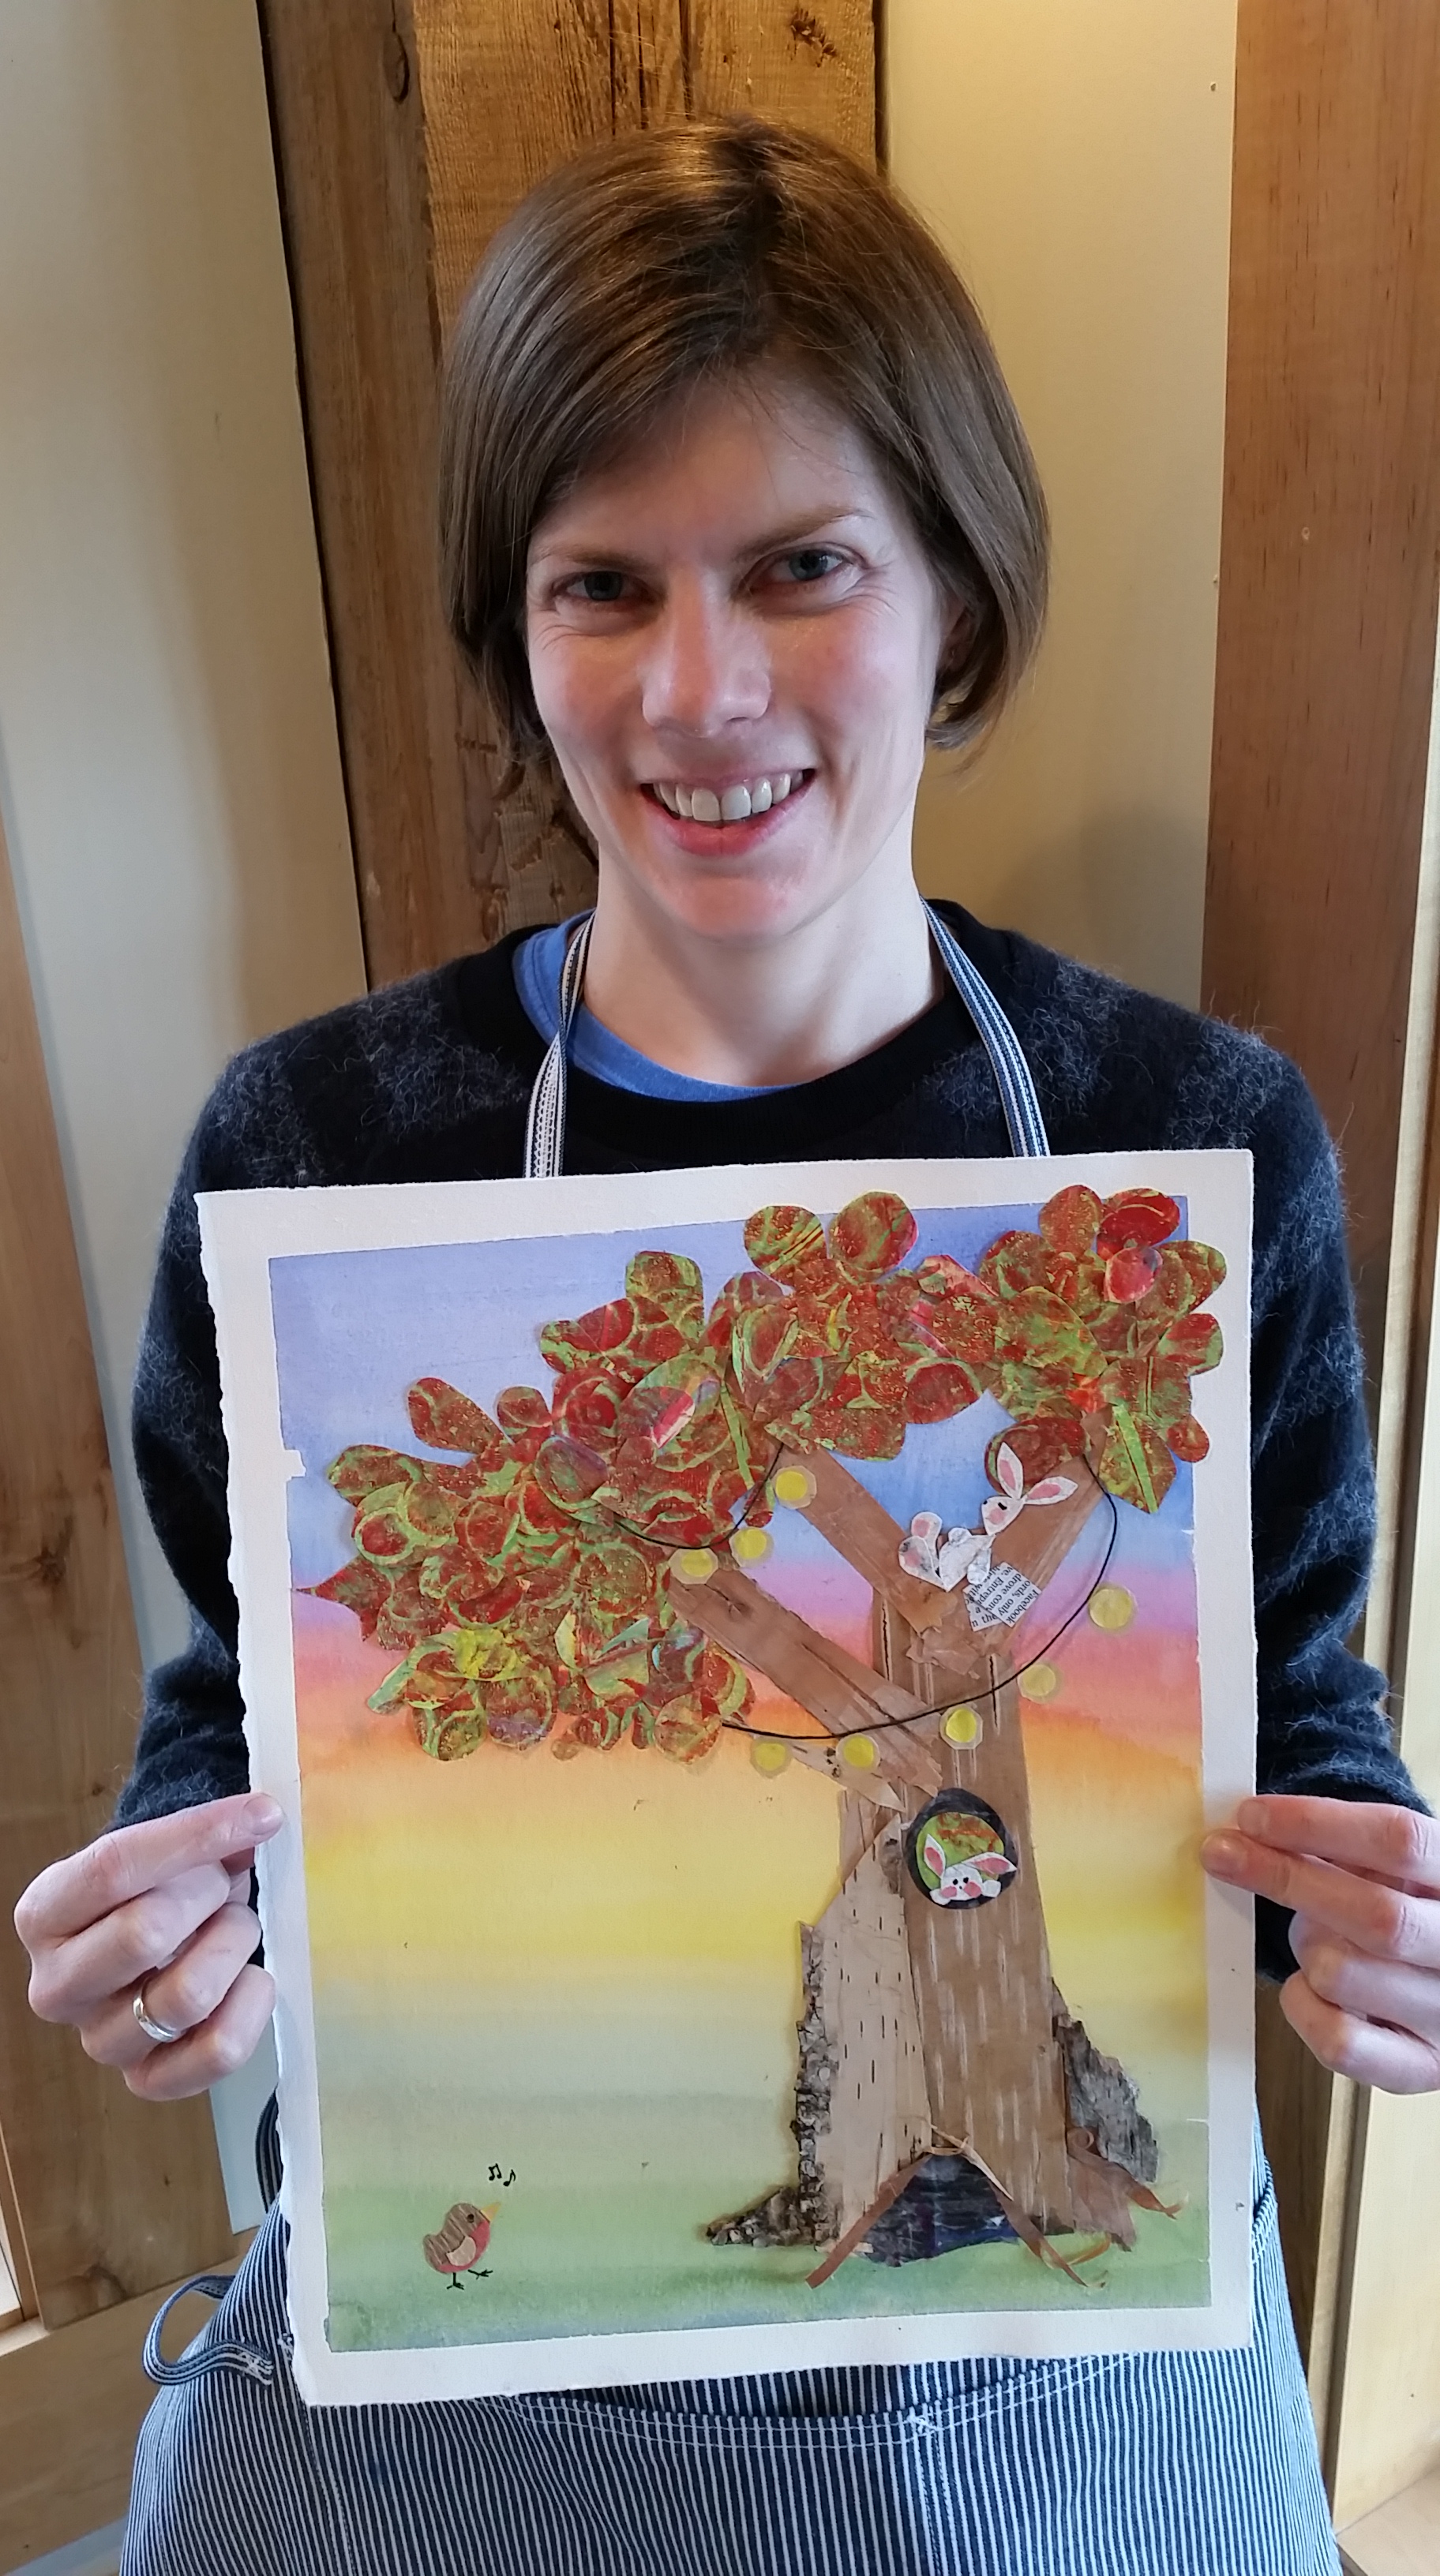
‘Not an artist’ made this collage last spring
You don’t need to feel confident drawing, painting, or coloring in the lines.
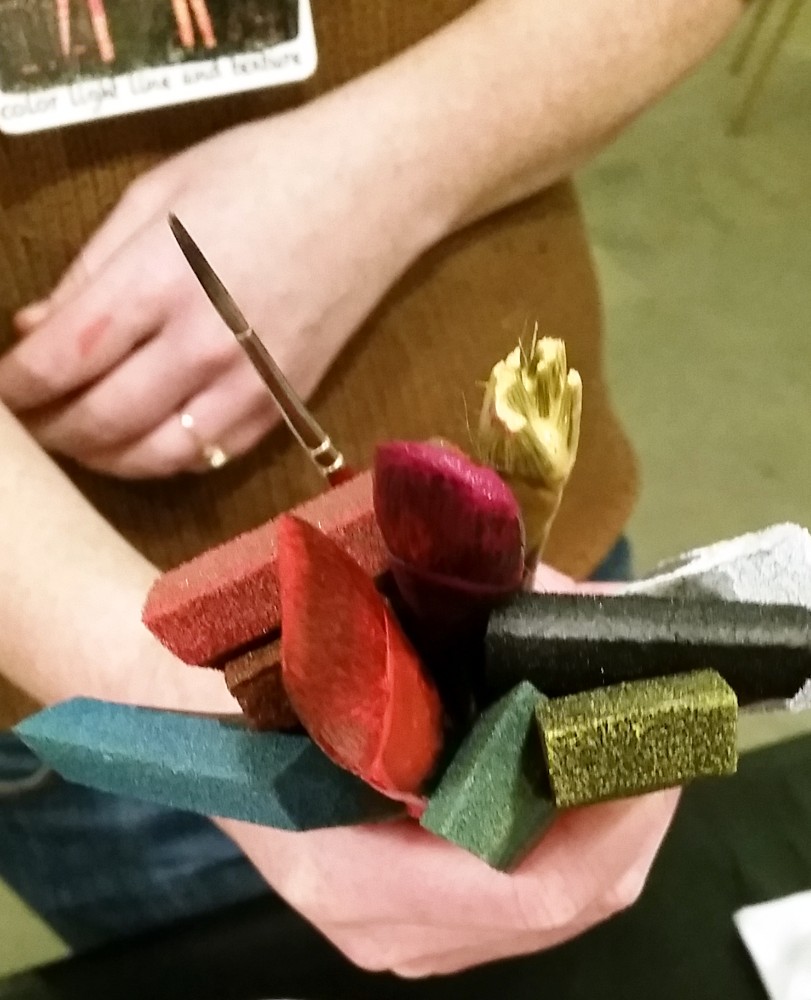
You DO need to have a love of tackling something new, and you have to be attracted to this:
COLOR
and this:
LIGHT
and this:
T E X T U R E
and this:
L I N E
Join us for 3 days and 3 nights of playing and getting deeply involved with color, light, texture and line!
The venue will be the Barn at Boyd’s Mills, 10 miles from Honesdale, PA. You’ll sleep in beautifully appointed cabins, dine on fantastic food at every meal and be entertained round the clock with lessons, games, surprise guest speakers, and a field trip.
I’ll be leading photography rambles and you can wander the pretty spring woods and pastures, so bring your camera and sketchbook.
Meansheets movie poster blog features vintage movie posters, French posters, Italian posters, British film posters, and famous poster artists-illustrators.


